


takaokaです。
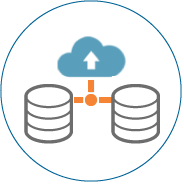
2台のEC2にCentOS 6.5をインストールし、DRBD8.4 + Pacemaker を組合せてクラスタ環境を導入してみました。 2台ともOS領域、データ領域のEBSをアタッチ。データ領域をDRBDで保護します。 サブネットは2つのAZに分けEC2をそれぞれに配置。2台間のセキュリティグループはここでは全て通しています。
下準備
2台のEC2(以降、1号機 / 2号機とよびます。)にCentOS6.5のインストールし、予め次の内容を実施しておきます。
・タイムゾーンの変更(UTC->JST) ・ntpインストールとntpd自動起動on ・ホスト名変更 1号機:drbd01.local / 2号機:drbd02.local としています。 ・selinux 無効化 ・iptables/ip6talbes 自動起動off ・yum install lvm2 xfsprogs ・サーバ再起動
DRBD同期用のパーティション設定
パーティション設定【1号機、2号機】
データ領域のパーティションをLVMで作成します。最終的に次のようになります。
[root@drbd01 ~]# fdisk -l /dev/xvdf

Disk /dev/xvdf: 2147 MB, 2147483648 bytes
255 heads, 63 sectors/track, 261 cylinders
Units = cylinders of 16065 * 512 = 8225280 bytes
Sector size (logical/physical): 512 bytes / 512 bytes
I/O size (minimum/optimal): 512 bytes / 512 bytes
Disk identifier: 0x76988ee9

    Device Boot      Start         End      Blocks   Id  System
/dev/xvdf1               1         261     2096451   8e  Linux LVM
[root@drbd01 ~]#
LVM設定【1号機、2号機】
次の内容を実行します。※結果は割愛しています。
[root@drbd01 ~]# pvcreate /dev/xvdf1
[root@drbd01 ~]# vgcreate VolDrbd /dev/xvdf1
[root@drbd01 ~]# lvcreate -L 1G -n lv_drbd VolDrbd
最終的に次のようになります。
[root@drbd01 ~]# pvs
  PV         VG      Fmt  Attr PSize PFree
  /dev/sdf1  VolDrbd lvm2 a--  2.00g 1020.00m
[root@drbd01 ~]# vgs
  VG      #PV #LV #SN Attr   VSize VFree
  VolDrbd   1   1   0 wz--n- 2.00g 1020.00m
[root@drbd01 ~]# lvs
  LV      VG      Attr       LSize Pool Origin Data%  Meta%  Move Log Cpy%Sync Convert
  lv_drbd VolDrbd -wi-a----- 1.00g
[root@drbd01 ~]#
DRBDのインストール、設定
DRBDのインストール【1号機、2号機】 次の内容を実行します。※結果は割愛しています。
# rpm --import https://www.elrepo.org/RPM-GPG-KEY-elrepo.org
# rpm -Uvh http://www.elrepo.org/elrepo-release-6-6.el6.elrepo.noarch.rpm
# yum install drbd84-utils kmod-drbd84
/etc/drbd.d/global_common.conf の修正【1号機、2号機】
変更前:
usage-count yes;
変更後:
usage-count no;
/etc/drbd.d/ebs.res 新規作成【1号機、2号機】
address行のIPアドレスは、各インスタンスのアドレスを記述しています。
resource r0 {
    protocol C;
    device /dev/drbd0;
    meta-disk internal;
    disk /dev/mapper/VolDrbd-lv_drbd;

    on drbd01.local {
        address 10.0.0.234:7789;
    }
    on drbd02.local {
        address 10.0.2.67:7789;
    }
}
DRBDのメタファイル作成【1号機、2号機】
次の内容を実行します。
[root@drbd01 ~]# drbdadm create-md r0
ERROR: modinfo: could not find module drbd
ERROR: modinfo: could not find module drbd
initializing activity log
NOT initializing bitmap
Writing meta data...
New drbd meta data block successfully created.
[root@drbd01 ~]#
drbdの自動起動off、サーバの再起動【1号機、2号機】
次の内容を実行します。※結果は割愛しています。
[root@drbd01 ~]# chkconfig drbd off
[root@drbd01 ~]# shutdown -r now
drbdの起動と確認【1号機、2号機】
【1号機】からdrbdを起動します
[root@drbd01 ~]# /etc/init.d/drbd start
Starting DRBD resources: [
     create res: r0
   prepare disk: r0
    adjust disk: r0
     adjust net: r0
]
..........
***************************************************************
 DRBD's startup script waits for the peer node(s) to appear.
 - If this node was already a degraded cluster before the
   reboot, the timeout is 0 seconds. [degr-wfc-timeout]
 - If the peer was available before the reboot, the timeout
   is 0 seconds. [wfc-timeout]
   (These values are for resource 'r0'; 0 sec -> wait forever)
 To abort waiting enter 'yes' [  20]: yes

.
WARN: nothing stacked for this host (drbd01.local), nothing to do in stacked mode!
[root@drbd01 ~]#
【1号機】drbdの状態を確認してみる
[root@drbd01 ~]# cat /proc/drbd
version: 8.4.6 (api:1/proto:86-101)
GIT-hash: 833d830e0152d1e457fa7856e71e11248ccf3f70 build by phil@Build64R6, 2015-04-09 14:35:00
 0: cs:WFConnection ro:Secondary/Unknown ds:Inconsistent/DUnknown C r----s
    ns:0 nr:0 dw:0 dr:0 al:0 bm:0 lo:0 pe:0 ua:0 ap:0 ep:1 wo:f oos:1048508
[root@drbd01 ~]#
【2号機】のdrbdも起動
[root@drbd02 ~]# /etc/init.d/drbd start
Starting DRBD resources: [
     create res: r0
   prepare disk: r0
    adjust disk: r0
     adjust net: r0
]
.
WARN: nothing stacked for this host (drbd02.local), nothing to do in stacked mode!
[root@drbd02 ~]#
【2号機】drbdの状態を確認してみる
[root@drbd02 ~]# cat /proc/drbd
version: 8.4.6 (api:1/proto:86-101)
GIT-hash: 833d830e0152d1e457fa7856e71e11248ccf3f70 build by phil@Build64R6, 2015-04-09 14:35:00
 0: cs:Connected ro:Secondary/Secondary ds:Inconsistent/Inconsistent C r-----
    ns:0 nr:0 dw:0 dr:0 al:0 bm:0 lo:0 pe:0 ua:0 ap:0 ep:1 wo:f oos:1048508
[root@drbd02 ~]#
【1号機】drbdの状態を確認してみる
[root@drbd01 ~]#  cat /proc/drbd
version: 8.4.6 (api:1/proto:86-101)
GIT-hash: 833d830e0152d1e457fa7856e71e11248ccf3f70 build by phil@Build64R6, 2015-04-09 14:35:00
 0: cs:Connected ro:Secondary/Secondary ds:Inconsistent/Inconsistent C r-----
    ns:0 nr:0 dw:0 dr:0 al:0 bm:0 lo:0 pe:0 ua:0 ap:0 ep:1 wo:f oos:1048508
[root@drbd01 ~]#
プライマリ昇格【1号機】
次の内容を実行します。実行後に同期が開始されます。
[root@drbd01 ~]# drbdadm -- --overwrite-data-of-peer primary r0
【1号機】同期中の状態
[root@drbd01 ~]# cat /proc/drbd
version: 8.4.6 (api:1/proto:86-101)
GIT-hash: 833d830e0152d1e457fa7856e71e11248ccf3f70 build by phil@Build64R6, 2015-04-09 14:35:00
 0: cs:SyncSource ro:Primary/Secondary ds:UpToDate/Inconsistent C r---n-
    ns:51224 nr:0 dw:0 dr:52020 al:0 bm:0 lo:0 pe:35 ua:7 ap:0 ep:1 wo:f oos:998044
        [>...................] sync'ed:  5.1% (998044/1048508)K
        finish: 0:03:36 speed: 4,584 (4,584) K/sec
[root@drbd01 ~]#
【2号機】同期中の状態
[root@drbd02 ~]# cat /proc/drbd
version: 8.4.6 (api:1/proto:86-101)
GIT-hash: 833d830e0152d1e457fa7856e71e11248ccf3f70 build by phil@Build64R6, 2015-04-09 14:35:00
 0: cs:SyncTarget ro:Secondary/Primary ds:Inconsistent/UpToDate C r-----
    ns:0 nr:110704 dw:110528 dr:0 al:0 bm:0 lo:9 pe:32 ua:8 ap:0 ep:1 wo:f oos:937980
        [=>..................] sync'ed: 11.0% (937980/1048508)K
        finish: 0:02:15 speed: 6,908 (6,908) want: 13,200 K/sec
[root@drbd02 ~]#
【1号機】同期完了の状態
[root@drbd01 ~]# cat /proc/drbd
version: 8.4.6 (api:1/proto:86-101)
GIT-hash: 833d830e0152d1e457fa7856e71e11248ccf3f70 build by phil@Build64R6, 2015-04-09 14:35:00
 0: cs:Connected ro:Primary/Secondary ds:UpToDate/UpToDate C r-----
    ns:1048508 nr:0 dw:0 dr:1049172 al:0 bm:0 lo:0 pe:0 ua:0 ap:0 ep:1 wo:f oos:0
[root@drbd01 ~]#
【2号機】同期完了の状態
[root@drbd02 ~]# cat /proc/drbd
version: 8.4.6 (api:1/proto:86-101)
GIT-hash: 833d830e0152d1e457fa7856e71e11248ccf3f70 build by phil@Build64R6, 2015-04-09 14:35:00
 0: cs:Connected ro:Secondary/Primary ds:UpToDate/UpToDate C r-----
    ns:0 nr:1048508 dw:1048508 dr:0 al:0 bm:0 lo:0 pe:0 ua:0 ap:0 ep:1 wo:f oos:0
[root@drbd02 ~]#
drbdの自動起動on【1号機、2号機】
次の内容を実行します。
[root@drbd01 ~]#chkconfig drbd on
データ領域のマウント、xfsフォーマット
【1号機、2号機】次の内容を実行します。
[root@drbd01 ~]# mkdir /data
【1号機】次の内容を実行します。
[root@drbd01 ~]# mkfs.xfs /dev/drbd0
meta-data=/dev/drbd0             isize=256    agcount=4, agsize=65532 blks
         =                       sectsz=512   attr=2, projid32bit=0
data     =                       bsize=4096   blocks=262127, imaxpct=25
         =                       sunit=0      swidth=0 blks
naming   =version 2              bsize=4096   ascii-ci=0
log      =internal log           bsize=4096   blocks=1200, version=2
         =                       sectsz=512   sunit=0 blks, lazy-count=1
realtime =none                   extsz=4096   blocks=0, rtextents=0
[root@drbd01 ~]# mount -t xfs /dev/drbd0 /data
【1号機】そして確認
[root@drbd01 ~]# mount
/dev/xvde on / type ext4 (rw)
proc on /proc type proc (rw)
sysfs on /sys type sysfs (rw)
devpts on /dev/pts type devpts (rw,gid=5,mode=620)
tmpfs on /dev/shm type tmpfs (rw)
none on /proc/sys/fs/binfmt_misc type binfmt_misc (rw)
/dev/drbd0 on /data type xfs (rw)
[root@drbd01 ~]# df -h
Filesystem      Size  Used Avail Use% Mounted on
/dev/xvde       7.8G  780M  6.6G  11% /
tmpfs           296M     0  296M   0% /dev/shm
/dev/drbd0     1020M   33M  988M   4% /data
[root@drbd01 ~]#
Pacemakerのインストール、設定
次のURLからheartbeatが入っている「pacemaker-1.0.13-2.1.el6.x86_64.repo.tar.gz」をダウンロードして、1号機、2号機にアップロードしておきましょう。
https://osdn.jp/projects/linux-ha/releases/61791
Pacemakerのインストール【1号機、2号機】
次の内容を実行します。※結果は割愛しています。
[root@drbd01 ~]# mv pacemaker-1.0.13-2.1.el6.x86_64.repo.tar.gz /tmp/
[root@drbd01 ~]# cd /tmp
[root@drbd01 tmp]# tar xzf pacemaker-1.0.13-2.1.el6.x86_64.repo.tar.gz
[root@drbd01 tmp]# cd pacemaker-1.0.13-2.1.el6.x86_64.repo/
[root@drbd01 tmp]# yum -c pacemaker.repo install pacemaker-1.0.13 heartbeat
Pacemakerの設定準備【1号機、2号機】
雛形が用意されているのでコピーします。
[root@drbd01 ~]# cp /usr/share/doc/heartbeat-3.0.5/authkeys /etc/ha.d/
[root@drbd01 ~]# cp /usr/share/doc/heartbeat-3.0.5/ha.cf /etc/ha.d/
/etc/ha.d/authkeys の修正【1号機、2号機】
サーバ間の認証方式。ここでは「crc」を指定しました。 変更前:
#auth 1
#1 crc
#2 sha1 HI!
#3 md5 Hello!
変更後:
auth 1
1 crc
#2 sha1 HI!
#3 md5 Hello!
設定ファイルのオーナーを変更する
[root@drbd01 ~]# chmod 600 /etc/ha.d/authkeys
/etc/ha.d/ha.cf の修正【1号機、2号機】
最終的に次のようにしました。ucast行のIPアドレスは、対向先のアドレスを記述します。
[root@drbd01 ~]# egrep -v '^#|^$' /etc/ha.d/ha.cf
pacemaker on
logfile /var/log/ha-log
logfacility     local0
keepalive 2
deadtime 30
warntime 10
initdead 120
udpport 694
ucast eth0 10.0.xx.xx
auto_failback on
node drbd01.local
node drbd02.local
[root@drbd01 ~]#
heartbeartの起動【1号機、2号機】
・今回のハマりポイント 1号機、2号機ともに「/etc/init.d/heartbeart start」を実行すると、何も表示されずプロンプトに戻ってしまう事象が発生。プロセスも存在しないのです。
試しに次の内容を実行したところ、/usr/libexec/heartbeat/heartbeatが存在しないためexitしています。
[root@drbd01 ~]# bash -x /etc/init.d/heartbeat start
~省略~
+ '[' -x /usr/libexec/heartbeat/heartbeat ']'
+ exit 0
[root@drbd01 ~]# ls -l /usr/libexec/heartbeat/heartbeat
ls: cannot access /usr/libexec/heartbeat/heartbeat: No such file or directory
[root@drbd01 ~]#
[/shell]
ちなみにheartbeat起動スクリプト内、上記エラー判定部分は次のように記述されています。
[shell]
[ -x $HA_BIN/heartbeat ] || exit 0
[/shell]
heartbeat実行ファイルをfindすると、lib64配下に存在している。
[shell]
[root@drbd01 ~]# find /usr/ -name heartbeat -type f
/usr/lib64/heartbeat/heartbeat
[root@drbd01 ~]#
調べたところ「/etc/ha.d/shellfuncs」内に直接 $HA_BIN を記述する方法で対処できるのが分かりましたが、今回はシンボリックリンクで対応しました。
・ハマリポイント回避【1号機、2号機】 heartbeartが起動しない場合の今回の対応。シンボリックリンクを張る。
[root@drbd01 ~]# ln -s /usr/lib64/heartbeat/heartbeat /usr/libexec/heartbeat/heartbeat
[root@drbd01 ~]# ls -l /usr/libexec/heartbeat/heartbeat
[root@drbd01 ~]# lrwxrwxrwx 1 root root 30 Nov 20 13:14 /usr/libexec/heartbeat/heartbeat -> /usr/lib64/heartbeat/heartbeat
・heartbeartの起動【1号機、2号機】
[root@drbd01 ~]# /etc/init.d/heartbeat start
Starting High-Availability services: Done.

[root@drbd01 ~]#
heartbeart確認【1号機、2号機】
次の内容を実行します。少し経ってからOnline部分に1号機、2号機が表示されクラスタに組み込まれたことがわかります。
[root@drbd01 ~]# crm status
============
Last updated: Fri Nov 20 13:16:01 2015
Stack: Heartbeat
Current DC: drbd02.local (85cb0a0e-d6d6-4d53-b86a-30207afca813) - partition with quorum
Version: 1.0.13-a83fae5
2 Nodes configured, unknown expected votes
0 Resources configured.
============

Online: [ drbd01.local drbd02.local ]

[root@drbd01 ~]#
Pacemakerにリソースを登録する【1号機】
次の内容を実行すると、リソースの登録が可能なプロンプトに変わります。
[root@drbd01 ~]# crm configure
INFO: building help index
crm(live)configure#
次の内容を実行し、DRBDリソースの設定を追加していきます。※プロンプト表示部は割愛しています。
property stonith-enabled="false" \
no-quorum-policy="ignore"

rsc_defaults resource-stickiness="INFINITY" \
migration-threshold="1"

primitive res_drbd ocf:linbit:drbd params drbd_resource="r0" \
op monitor interval="10s" role="Slave" timeout="20s" \
op monitor interval="10s" role="Master" timeout="20s" \
op start interval="0s" timeout="240s" \
op stop interval="0s" timeout="100s"

ms ms_drbd res_drbd meta notify="true"

primitive res_fs ocf:heartbeat:Filesystem params device="/dev/drbd0" directory="/data" fstype="xfs" \
op start interval="0s" timeout="60s" \
op stop interval="0s" timeout="60s"

colocation col_fs_drbd inf: res_fs ms_drbd:Master

order ord_fs_drbd inf: ms_drbd:promote res_fs:start
上記を実行すると設定のみ追加され、まだ登録されていません。 次の内容を実行して、設定を登録反映します。
crm(live)configure# commit
設定の確認
crm(live)configure# show
node $id="4b57ec36-924a-43fa-9b20-505342daa2f0" drbd01.local
node $id="bde01230-cb7b-45b5-82b1-92c4954203b6" drbd02.local
primitive res_drbd ocf:linbit:drbd \
        params drbd_resource="r0" \
        op monitor interval="10s" role="Slave" timeout="20s" \
        op monitor interval="10s" role="Master" timeout="20s" \
        op start interval="0s" timeout="240s" \
        op stop interval="0s" timeout="100s"
primitive res_fs ocf:heartbeat:Filesystem \
        params device="/dev/drbd0" directory="/data" fstype="xfs" \
        op start interval="0s" timeout="60s" \
        op stop interval="0s" timeout="60s"
ms ms_drbd res_drbd \
        meta notify="true"
colocation col_fs_drbd inf: res_fs ms_drbd:Master
order ord_fs_drbd inf: ms_drbd:promote res_fs:start
property $id="cib-bootstrap-options" \
        dc-version="1.0.13-a83fae5" \
        cluster-infrastructure="Heartbeat" \
        stonith-enabled="false" \
        no-quorum-policy="ignore"
rsc_defaults $id="rsc-options" \
        resource-stickiness="INFINITY" \
        migration-threshold="1"
crm(live)configure# bye
[root@drbd01 ~]#
リソース登録後のクラスタ確認
[root@drbd01 ~]# crm status
============
Last updated: Fri Nov 20 13:19:19 2015
Stack: Heartbeat
Current DC: drbd02.local (85cb0a0e-d6d6-4d53-b86a-30207afca813) - partition with quorum
Version: 1.0.13-a83fae5
2 Nodes configured, unknown expected votes
2 Resources configured.
============

Online: [ drbd01.local drbd02.local ]

 Master/Slave Set: ms_drbd
     Masters: [ drbd01.local ]
     Slaves: [ drbd02.local ]
 res_fs (ocf::heartbeat:Filesystem):    Started drbd01.local
[root@drbd01 ~]#
これでDRBDもクラスタに組み込まれ制御される状態になりました。
2号機にDRBDリソース切り替えてみる
ここはおもむろに1号機をshutdownして停止してみます。 1号機停止後、2号機側で次の内容を実行して確認してみます。1号機側はOFFLINEとなり、2号機側でDRBDのリソースを持っていることが確認できます。
[root@drbd02 ~]# crm status
============
Last updated: Fri Nov 20 13:21:56 2015
Stack: Heartbeat
Current DC: drbd02.local (85cb0a0e-d6d6-4d53-b86a-30207afca813) - partition with quorum
Version: 1.0.13-a83fae5
2 Nodes configured, unknown expected votes
2 Resources configured.
============

Online: [ drbd02.local ]
OFFLINE: [ drbd01.local ]

 Master/Slave Set: ms_drbd
     Masters: [ drbd02.local ]
     Stopped: [ res_drbd:0 ]
 res_fs (ocf::heartbeat:Filesystem):    Started drbd02.local
[root@drbd02 ~]#
[/shell]
2号機側でデータ領域がマウントされる。
[shell]
[root@drbd02 ~]# mount
/dev/xvde on / type ext4 (rw)
proc on /proc type proc (rw)
sysfs on /sys type sysfs (rw)
devpts on /dev/pts type devpts (rw,gid=5,mode=620)
tmpfs on /dev/shm type tmpfs (rw)
none on /proc/sys/fs/binfmt_misc type binfmt_misc (rw)
/dev/drbd0 on /data type xfs (rw)
[root@drbd02 tmp]# df -h
Filesystem      Size  Used Avail Use% Mounted on
/dev/xvde       7.8G  946M  6.5G  13% /
tmpfs           296M     0  296M   0% /dev/shm
/dev/drbd0     1020M   33M  988M   4% /data
[root@drbd02 ~]#

